How to Change a Washer on a Mixer Tap
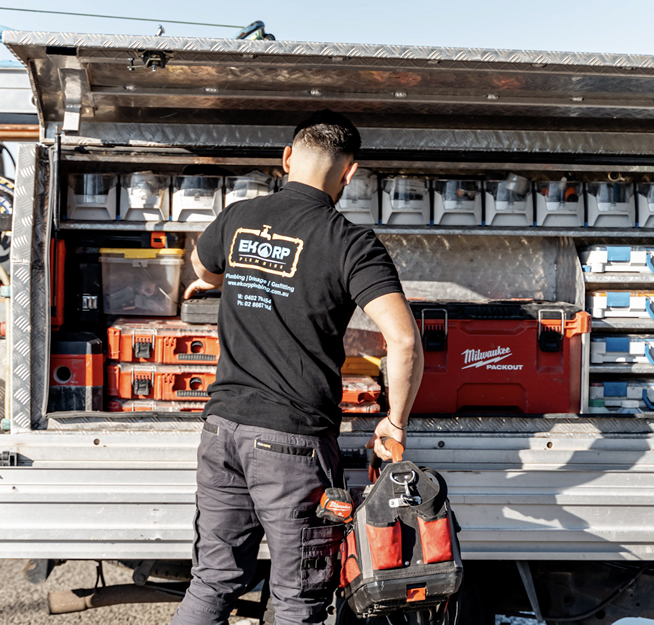
That drip, drip, drip from your kitchen or bathroom mixer tap is more than just annoying. It’s wasting water and quietly padding your bill every quarter. The fix is usually dead simple: a new washer or cartridge. Most Sydney homeowners can sort it themselves in under an hour with a few basic tools. This guide walks you through the whole job, from knowing what you’re dealing with to testing the repair when you’re done. If things get tricky, EKORP Plumbing is on call 24/7 at 02 8667 5354 with a 60-minute response and $0 callout across St George, Sutherland Shire, and Georges River.
Understanding Mixer Taps and Common Issues
Unlike old-style taps with separate hot and cold knobs, a mixer tap combines both into one spout. That means one washer or cartridge is doing the heavy lifting for both temperature and flow control.
Types of Mixer Taps:
- Single-Lever Mixer Taps: One handle runs the show for both temperature and flow. Most use a ceramic disc cartridge inside.
- Dual-Handle Mixer Taps: Separate hot and cold handles. May use traditional rubber washers or cartridges depending on age and brand.
- Pull-Out Mixer Taps: Kitchen taps with an extendable spray head. Common in modern Sydney homes.
Common Causes of Leaking Mixer Taps:
- Worn Washers or O-Rings: The number one culprit, especially on older taps.
- Damaged Ceramic Disc Cartridge: Found in most single-lever taps. They can crack or wear with age.
- Loose Connections: Drips at the base or under the sink often point to loose fittings, not the washer itself.
- Corroded Valve Seats: If the surface the washer presses against is rough or pitted, the tap will keep dripping no matter how many washers you fit.
- High Water Pressure: Sydney’s mains pressure can be hard on tap internals and chew through washers faster than normal.
Tools and Materials You’ll Need
Get everything together before you start. A mid-job run to Bunnings is the fastest way to add an hour to a 20-minute job. Most of this stuff is at any hardware store in Sydney.
Essential Tools:
- Adjustable wrench or spanner
- Allen key set (hex keys) – most mixer taps need these
- Flathead and Phillips head screwdrivers
- PTFE tape (plumber’s tape)
- Old cloth or towel to protect the sink basin
- Small container to hold screws and bits
- Torch or phone light
Replacement Parts:
- Tap washers (grab a variety kit so you’ve got options)
- O-rings (if your tap uses them)
- Ceramic disc cartridge (check your tap’s brand and model first)
- Silicone grease (plumber’s grease)
Pro tip: Take a photo of your existing tap or bring the old washer or cartridge to the store. Many mixer taps use brand-specific cartridges, so knowing your manufacturer (Methven, Caroma, Mondella, etc.) saves a second trip.
Step-by-Step Guide: How to Change a Mixer Tap Washer
Take your time and don’t force anything. If a part won’t budge, you’ve probably missed a hidden screw or locking ring somewhere.
Step 1: Turn Off the Water Supply
- Find the isolation valves under the sink and turn them clockwise to shut off both hot and cold water.
- No isolation valves? You’ll need to shut off the main at the water metre.
- Open the tap fully to bleed off any pressure left in the line.
- Pop a cloth or towel in the sink to catch dropped screws and protect the basin.
Step 2: Remove the Tap Handle
How the handle comes off depends on the style of tap you’ve got.
For Single-Lever Taps:
- Look for a small cap near the base or top of the lever. Pry it off with a flathead screwdriver to find a set screw underneath.
- Use an Allen key (usually 2mm, 2.5mm, or 3mm) and turn anti-clockwise to loosen.
- Lift the handle straight up. A gentle side-to-side wiggle helps if it’s a bit stuck.
For Dual-Handle Taps:
- Pop off the decorative cap on top of each handle.
- Unscrew the handle screw (usually Phillips head) and pull the handle up.
Step 3: Remove the Tap Body or Cover
- With the handle off you’ll see a chrome cover or shroud. This usually unscrews by hand. If you need a wrench, wrap the cover in cloth first to protect the finish.
- Some taps have a locking nut or retaining ring. Turn it anti-clockwise with an adjustable wrench.
- Under the cover you’ll find the cartridge or spindle holding the washer or ceramic discs.
Step 4: Access and Remove the Washer or Cartridge
For Traditional Washer Systems:
- At the bottom of the valve stem, you’ll spot a small screw holding the washer in place.
- Undo the screw and pull out the old washer.
- Have a good look at the valve seat (the surface the washer sits against). If it’s pitted or rough, that’s why the drip keeps coming back.
For Ceramic Disc Cartridges:
- The whole cartridge usually needs swapping out, not just a washer.
- Pull it straight up. Some have clips; others need a slight twist.
- Before you pull it, note which way it’s oriented. It must go back the same way.
- Take the old cartridge to the hardware store to match it exactly.
Step 5: Install the New Washer or Cartridge
For Washer Replacement:
- Pick the washer that fits snugly in the valve seat from your kit.
- Rub a thin smear of plumber’s grease on it before fitting.
- Seat the washer on the valve stem and tighten the screw. Firm is fine; don’t crank it.
- While you’re in there, swap out any O-rings you can see. They’re cheap and save you from coming back.
For Cartridge Replacement:
- Line up the new cartridge to match the orientation of the old one. There’s usually a notch or flat side to guide you.
- Push it straight down until it seats fully.
- Lock it in with the retaining nut or clips.
Step 6: Reassemble the Tap
- Screw the decorative cover or shroud back on, hand-tight first then a snug turn with the wrench.
- Reattach the handle, making sure it’s aligned right.
- Tighten the set screw or handle screw firmly but not overly so.
- Snap the decorative cap back in place.
Step 7: Test Your Repair
- Slowly open the isolation valves under the sink.
- Watch all the connections as pressure comes back up. Any drips show up fast.
- Turn the tap on and off a few times, checking both hot and cold.
- Let it run for a minute, then shut it off and wait 5-10 minutes watching the spout.
- Have a look under the sink for moisture.
No drips and smooth operation? Job done. If it’s still leaking, double-check that everything is seated correctly. Persistent drips after a second look usually mean there’s underlying damage that needs a professional eye.
Troubleshooting Common Problems
Problem: Tap Still Drips After Replacing Washer
- Wrong washer size – try going one size up or down
- Damaged valve seat – may need professional resurfacing or a full tap replacement
- Washer not seated right – take it apart again and check the fit
- Crack in the tap body – the tap needs replacing, not repairing
Problem: Handle Won’t Come Off
- Try a penetrating oil spray and leave it 15 minutes
- Tap gently from underneath with a rubber mallet
- Check you’ve removed all screws – there may be a hidden one
- A handle puller tool from the hardware store does this job properly
Problem: Water Leaks from Base When Tap is Running
- This is usually an O-ring issue, not the washer
- Pull the tap apart and check every O-ring in the assembly
- Replace anything that looks cracked, squashed, or degraded
- Apply plumber’s grease to new O-rings before reassembly
Problem: Low Water Pressure After Reassembly
- Unscrew and clean the aerator – mineral buildup is the usual culprit
- Check that the isolation valves are fully open
- If you replaced a cartridge, it might be sitting backwards – check the orientation
When to Call a Professional Plumber
DIY is great when it works. But some situations are better handed off to a licensed plumber straight away:
- Tap still drips after washer replacement – the valve seat or internal body may need professional assessment.
- Corroded or seized parts – forcing old corroded fittings causes expensive damage fast.
- No isolation valves – if you have to shut off the whole house to do tap work, a plumber gets the job done quicker.
- Designer or imported taps – some high-end taps have unusual cartridge systems not found in standard hardware stores.
- Multiple failed attempts – if the drip keeps coming back after two goes, get a professional diagnosis.
- Warranty concerns – some tap warranties need professional installation and repair to stay valid.
EKORP Plumbing holds Licence 322223C and handles all types of leaking tap repairs across St George, Sutherland Shire, and Georges River. Our plumbers carry a full stock of washers, O-rings, and cartridges on the van so most jobs get done in one visit.
Preventing Future Mixer Tap Problems
A bit of regular care goes a long way toward keeping your taps running cleanly for years.
Don’t Over-Tighten When Turning Off
Once you feel resistance, that’s the tap shut. Cranking it harder compresses the washer too much and wears it out faster. Teach everyone in the house the same habit.
Address Drips Promptly
A small drip now means a wrecked valve seat later. Fix minor leaks as soon as you spot them. It takes 20 minutes now or a bigger job in six months.
Clean Aerators Regularly
Sydney tap water deposits minerals in aerators over time, reducing flow and pushing internal components harder. Unscrew and rinse them out every few months.
Check for Leaks Periodically
A quick look under the sink once a month can catch a slow leak before it becomes water damage. Look for moisture, staining, or that musty smell.
Consider Water Pressure
If your taps and showerheads seem unusually forceful, your mains pressure might be running too high. A pressure-reducing valve on the main line protects all your plumbing fixtures.
Replace Washers Proactively
If one tap in the house needs a washer and the others are the same age, they’re not far behind. Knock them all over in one go rather than dealing with call-outs one at a time.
Frequently Asked Questions
How long do mixer tap washers last?
With normal use, rubber tap washers last around 3-5 years. Ceramic disc cartridges in modern mixer taps can run for 10-15 years or more. Hard water areas of Sydney may see faster wear from mineral deposits.
What size washer do I need for a mixer tap?
Mixer tap washers generally run from 12mm to 20mm in diameter. The safest approach is to pull the old washer out and take it to the store for matching, or buy a washer assortment kit that covers multiple sizes.
Can I use any washer in my mixer tap?
Not always. Mixer taps often need washers or cartridges specific to that brand. Using the wrong one can mean continued leaking or damage to the valve seat. Match the washer to your tap’s specs and check the manufacturer’s documentation when unsure.
How much does it cost to replace a mixer tap washer in Sydney?
A DIY washer kit costs $5-15 at most hardware stores. Basic tools will add another $30-50 if you don’t already have them. A licensed plumber typically charges $120-200 for a standard tap repair in Sydney, which covers labour, parts, and the work being done right first time. Complex repairs or cartridge swaps may cost more.
Is it better to repair or replace an old mixer tap?
If the tap is under 10 years old and just needs a washer or cartridge, a repair usually makes sense. Older taps showing corrosion, needing hard-to-find parts, or with multiple problems at once are often cheaper to replace. A plumber can give you a straight answer on which way to go.
Final Thoughts: Save Water and Money with Proper Tap Maintenance
Changing a washer on a mixer tap is a handy skill for any Sydney homeowner. With the right tools and a bit of patience, you can stop that drip for good and save water. A single leaking tap can waste more than 20,000 litres a year. That’s money straight down the drain.
The key things to remember: shut the water off first, take photos during disassembly so you know what goes back where, don’t force anything, and fit a fresh O-ring while you’re in there anyway. Keep a washer kit in the toolbox and deal with leaks the moment you notice them.
If you run into trouble or just want the job done properly without the fuss, call EKORP Plumbing on 02 8667 5354. We’re available 24/7, respond within 60 minutes across St George, Sutherland Shire, and Georges River, and there’s no callout fee. Licence 322223C.